Coffee Roasting
Freshly roasted coffee can transform your morning cup. Commercial beans often sit on shelves for weeks, losing their vibrant aromas and oils. Home roasting lets you decide how light or dark your beans should be and costs far less than buying specialty roasts. Green coffee beans sell for about $4–7 per pound and yield roughly 12–13 oz of roasted beans. In less than 20 minutes you can roast enough coffee for a week using common kitchen tools.
Equipment & Ingredients
You can roast coffee without an expensive roaster. A few household items are all you need:
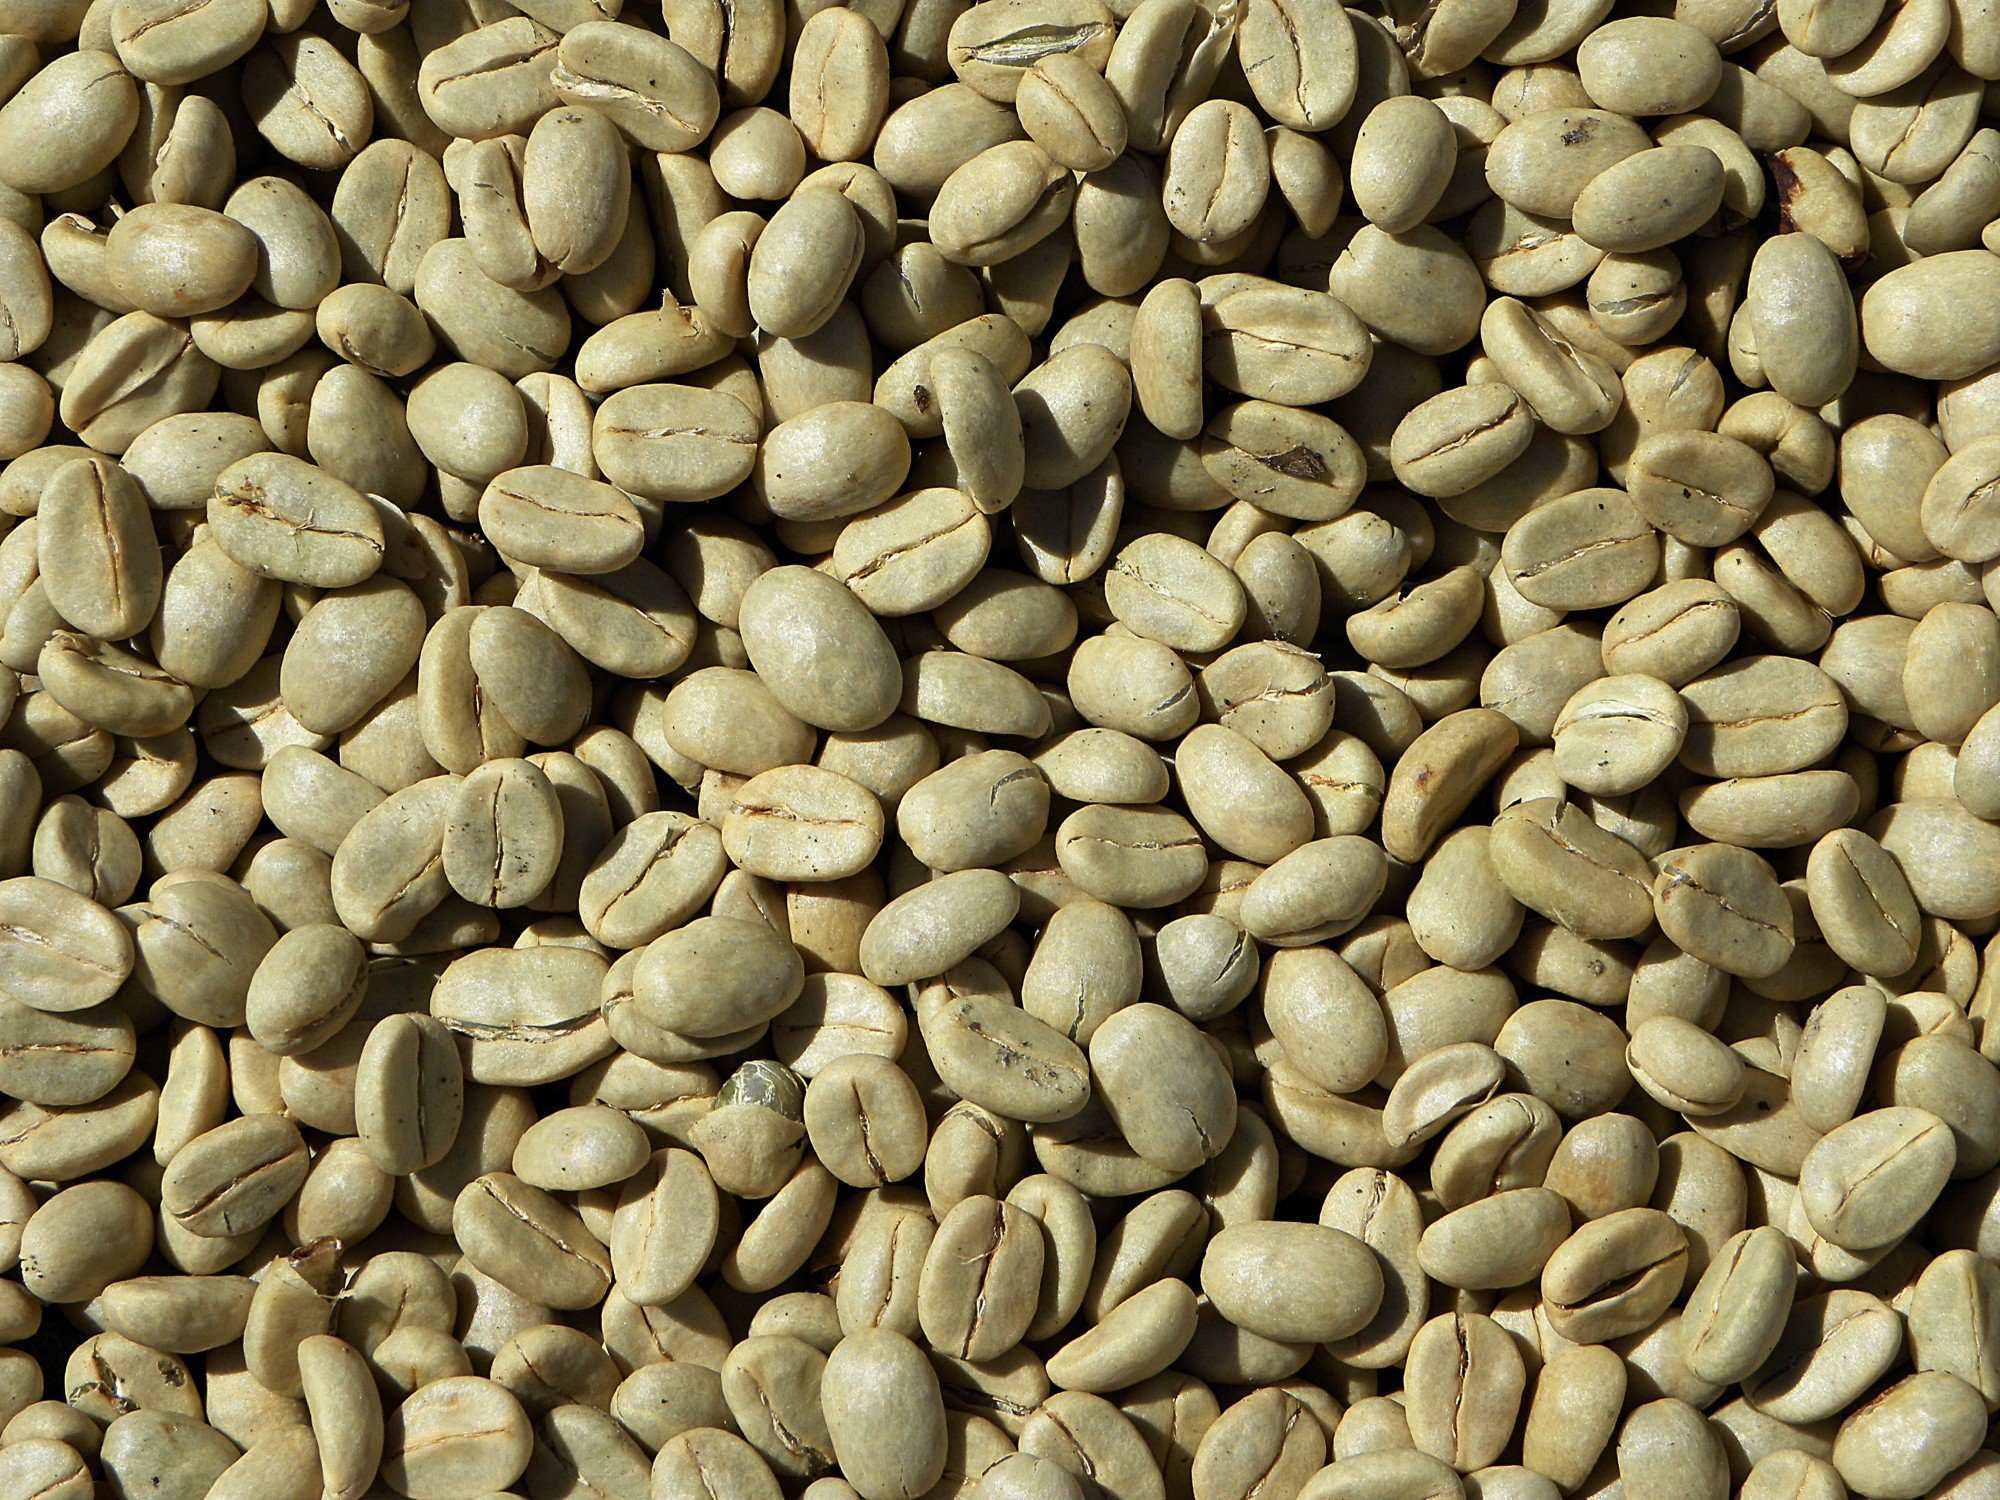
Green Coffee Beans (Before Roasting)
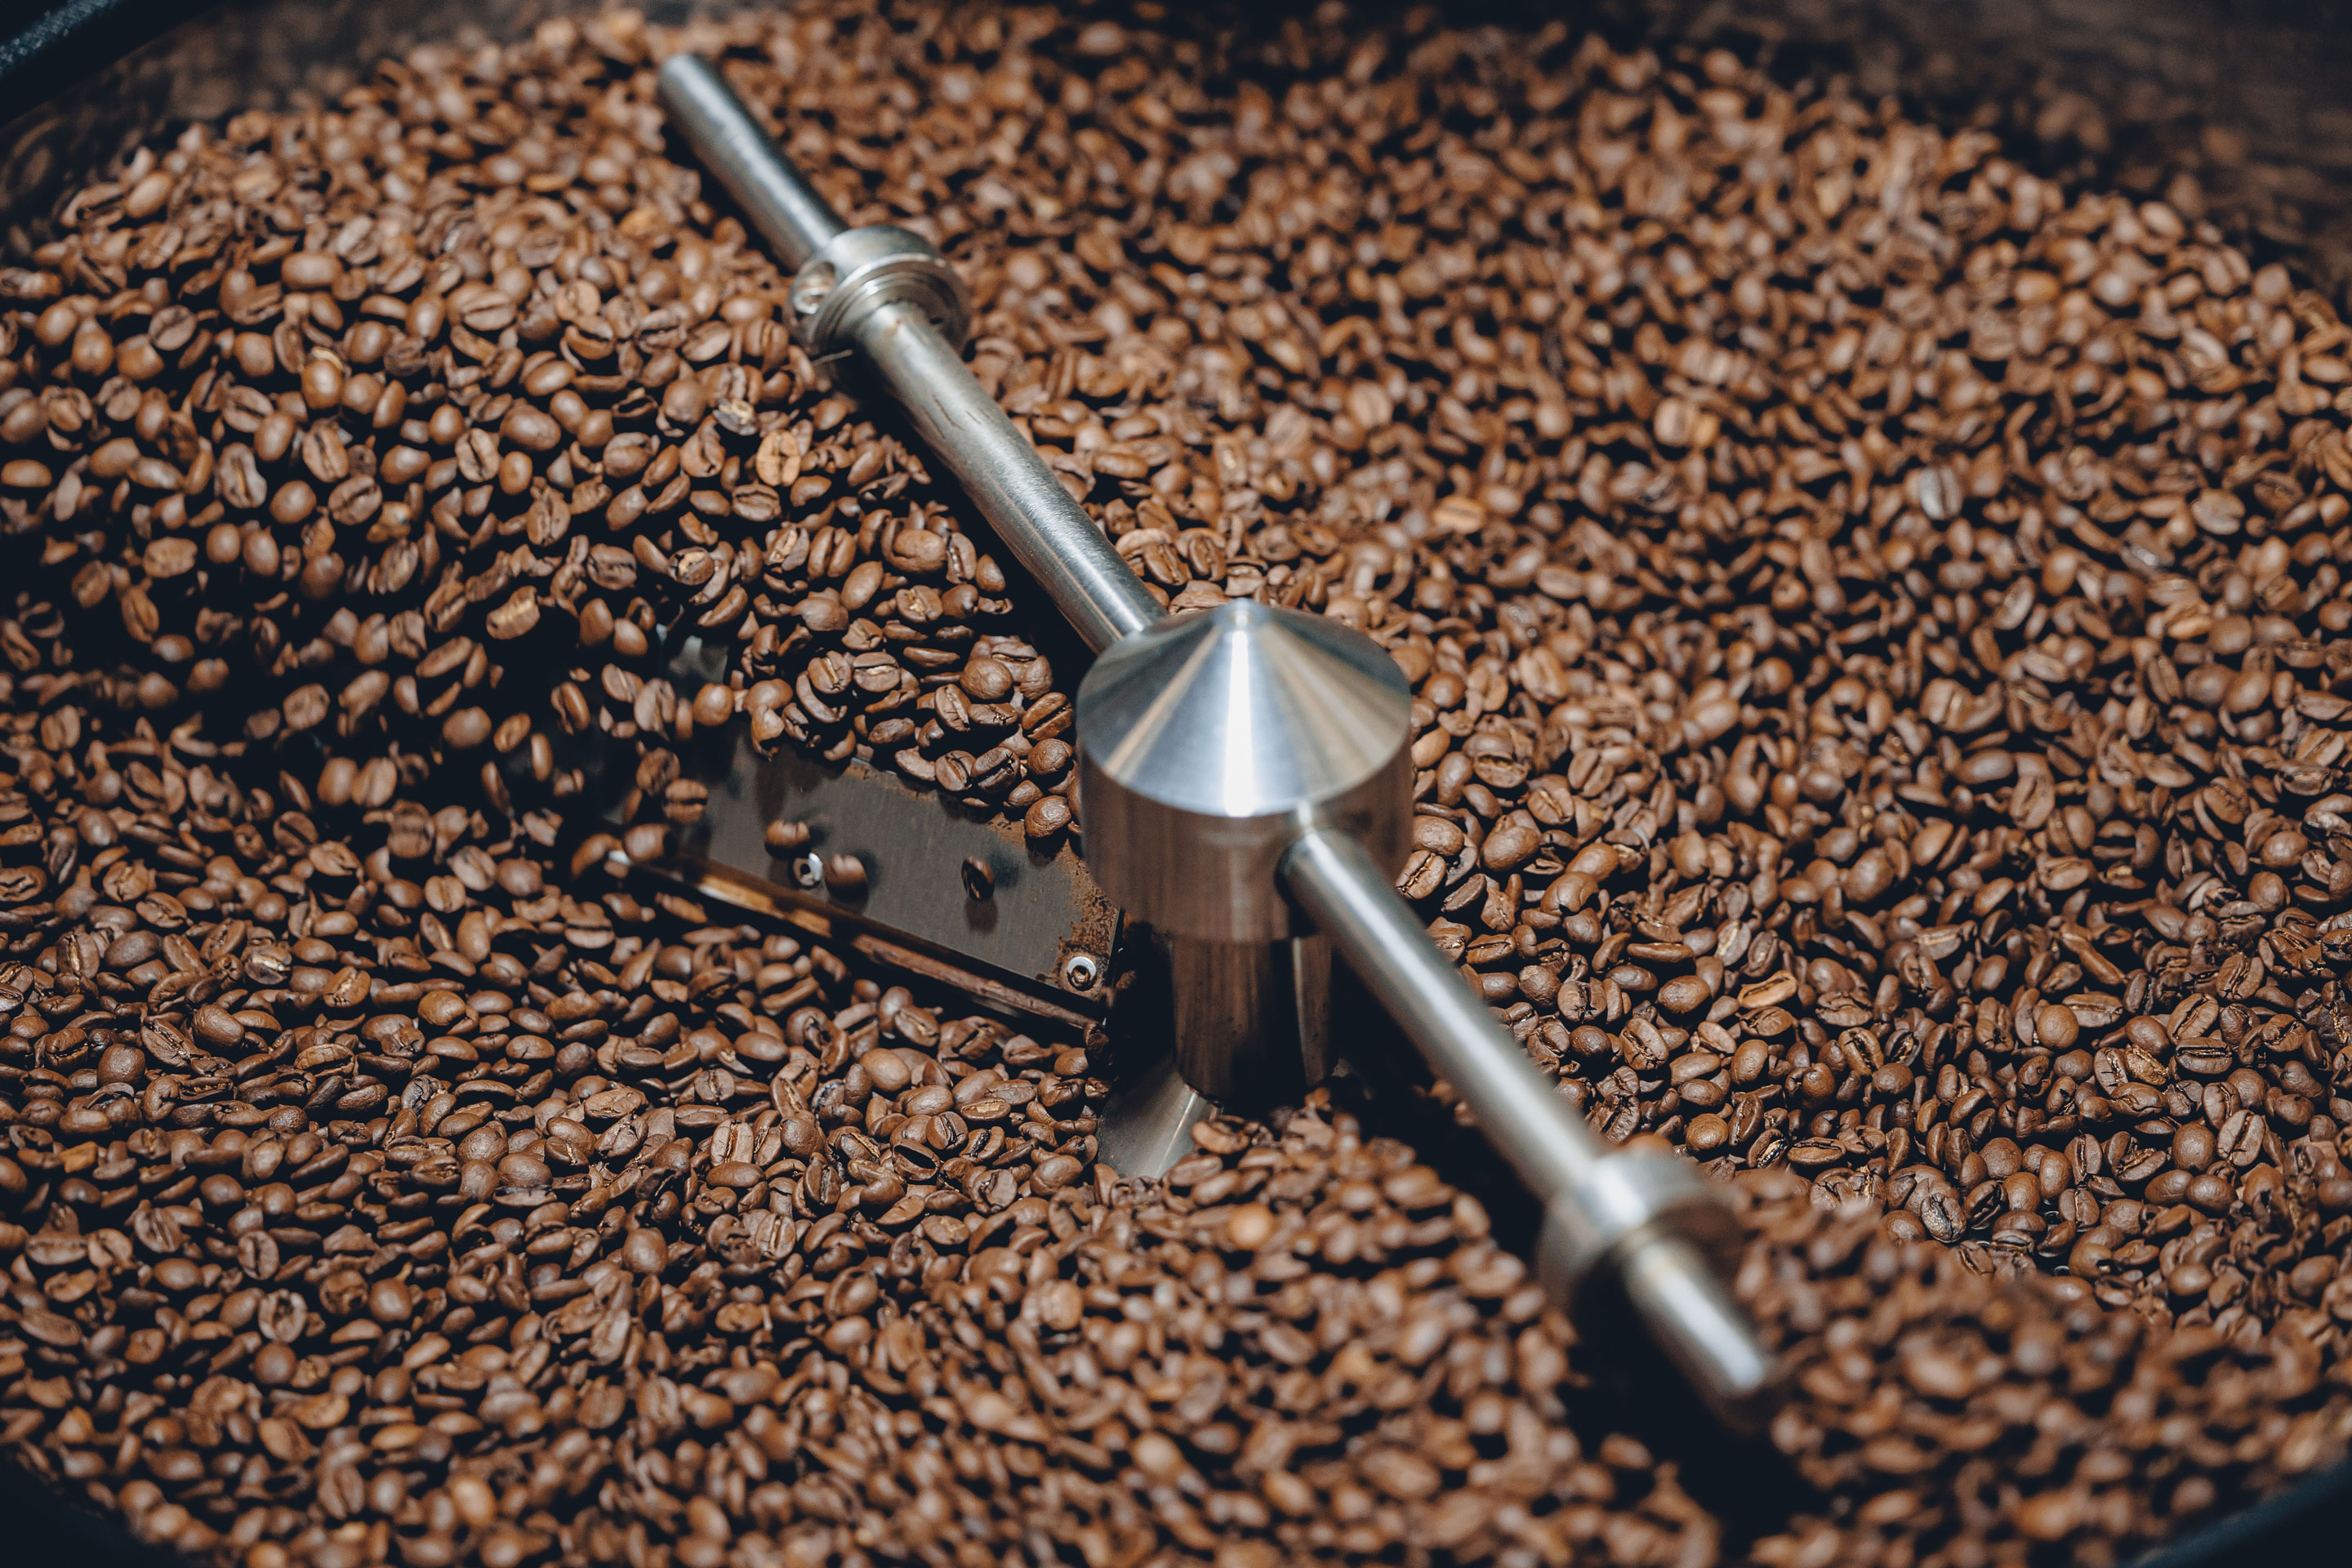
Roasted Coffee Beans (After Roasting)
- Roasting vessel – Use a cast‑iron skillet, wok or heavy pan. A stovetop popcorn popper (e.g., Whirley‑Pop) also works well. The vessel needs to conduct heat evenly and allow constant agitation.
- Heat source – A stovetop burner or your oven provides the necessary heat. For pan methods you'll need medium‑high heat; for oven roasting preheat to 450 °F.
- Stirring tool – A wooden spoon or metal whisk keeps the beans moving.
- Cooling setup – A metal colander and a sheet pan help cool the beans and remove chaff. Oven mitts are essential when handling hot equipment and beans.
- Storage container – Use an airtight jar or a coffee container with a CO₂‑release valve. Wait about 12 hours before sealing freshly roasted beans so they can off‑gas.
- Green coffee beans – Start with a pound of beans from your favorite origin. Many local roasters sell green beans, or you can order samplers online.
Method 1 – Stovetop Skillet or Wok
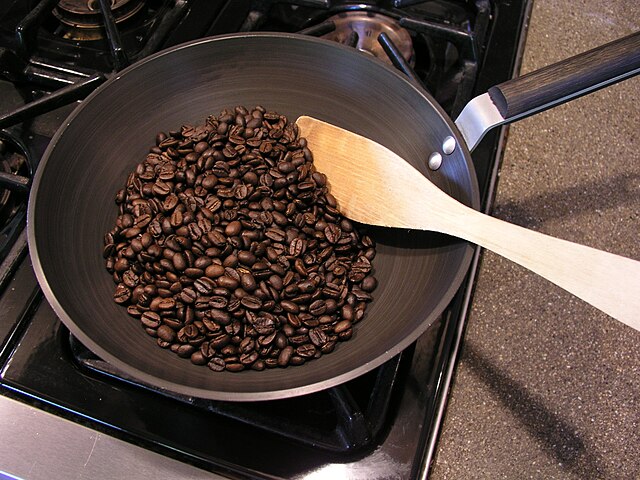
Roasting in a skillet is the most hands‑on method. You control the heat and agitation, so patience is important.
- Ventilate and preheat: Turn on your stove's exhaust fan or open a window. Preheat a heavy skillet with a lid over low to medium heat until it reaches about 400 °F, then stabilise the temperature around 450 °F. You can use an oven thermometer inside the pan to check the temperature.
- Measure and load beans: Weigh about 9 oz (12 oz by volume) of green beans for a large skillet. Once the pan is hot, remove the thermometer and add the beans.
- Stir continuously: Keep the beans in motion by stirring with a spoon or shaking the pan. Covering the pan traps heat but makes stirring difficult; some roasters alternate covering and stirring.
- Watch and listen: After 5–7 minutes you'll hear the first crack (a popcorn‑like crackle) and smell smoke. Taper the heat slightly to avoid scorching. Check the color every minute.
- End the roast: Pour the beans into a colander when they're slightly lighter than your target roast, as they will continue to darken while cooling.
- Cool and de‑chaff: Agitate the beans in a colander until warm. Blow gently to remove the papery chaff.
Pros & Cons: Skillet roasting is cheap and lets you see the roast develop, but it requires constant attention and can produce uneven roasts or scorching. An air popper or roasting machine yields more even results but costs more.
Method 2 – Stovetop Popcorn Popper
A hand‑cranked stovetop popcorn popper (e.g., Victorio or Whirley‑Pop) offers more control and yields consistent roasts.
- Preheat and load: Place the popper on a medium‑hot burner and preheat. Add about 8 oz of green beans.
- Crank constantly: Turn the crank steadily to agitate the beans; this prevents scorching and promotes even heating.
- Monitor cracks: Listen for first crack and then second crack to reach your desired roast level. Because the popper has a hinged lid, you can observe color changes while keeping heat in.
- Cool and store: Pour the beans into a colander for cooling and chaff removal. Store them in an airtight container after off‑gassing.
Pros & Cons: Stovetop poppers can roast ½–1 pound per batch and allow a range of roast profiles. They're quiet, making cracks easy to hear. However, they require manual cranking and produce more smoke than air roasters.
Method 3 – Oven Roasting
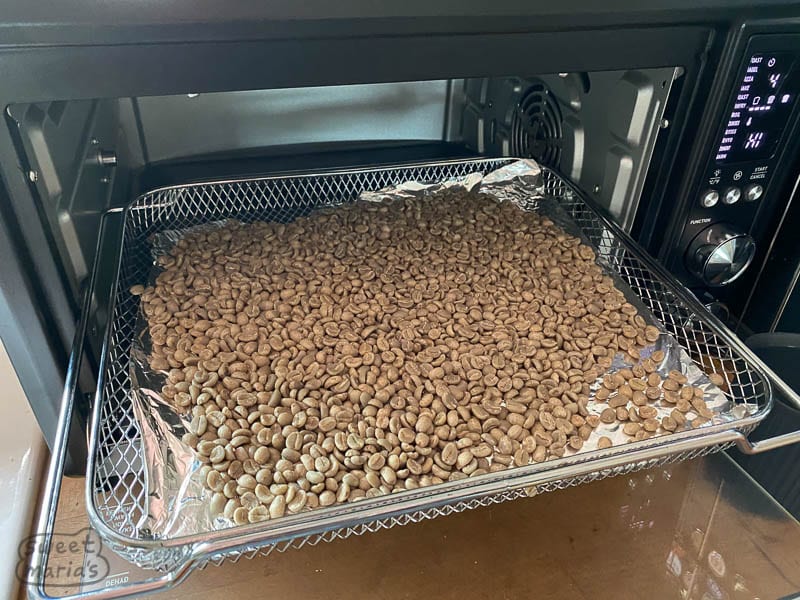
Oven roasting is straightforward and uses equipment you already own.
- Preheat: Heat your oven to 450 °F.
- Prepare the beans: Spread green beans in a single layer on a cookie sheet, leaving a hole in the middle to promote air circulation.
- Roast: Place the pan on the middle rack. Note the time and watch the beans closely as they change color and smell.
- Stir occasionally: Stir once or twice during the roast to promote even coloring.
- Monitor cracks: Listen for the first crack at around seven minutes. Remove the beans after first crack for a light roast or wait for the second, smaller crack to achieve medium roast. Prolonged roasting beyond second crack is not recommended for ovens due to smoke and risk of burning.
- Cool and de‑chaff: Immediately transfer the hot beans to a cooling bowl or colander. Swirl and blow to remove chaff, then let the beans cool completely. Store in an airtight container once cool, and enjoy within seven days for peak freshness.
Understanding Roast Levels – First & Second Crack
Roast level is primarily determined by how long you roast and where you stop relative to two key events:
- First crack: As internal moisture turns to steam, beans emit a cracking sound at around 385 °F. Removing the beans after first crack yields a light roast, which retains more acidity and caffeine.
- Second crack: Continued roasting triggers a second series of crackles at about 450 °F. Stopping here produces a medium roast; roasting 90 seconds beyond second crack creates a dark espresso roast with oily surfaces. Going much beyond second crack risks burning the beans and generating charcoal‑like flavors.
By listening for these audible cues and monitoring the bean color, you can tailor each batch to your preferred taste.
Cooling, Removing Chaff & Storage
After roasting, the beans remain hot and continue to darken. Cooling and de‑chaffing properly preserves flavor:
- Dump into a colander: Immediately pour beans into a metal colander and agitate to stop the roasting process.
- Remove chaff: Blow gently to remove the papery husk; do this outdoors or over a sink to avoid a mess.
- Spread on a sheet pan: Let the beans cool to room temperature before storage.
- Vent during storage: Freshly roasted beans release CO₂ for 12–24 hours. Store them in an airtight jar out of direct light but leave the lid slightly loose or "burp" the container occasionally. Beans taste best within five to seven days.
Safety & Practical Tips
- Ventilation is key: Home roasting produces smoke, especially at second crack. Use a strong exhaust fan or open windows.
- Stir continuously: Whether using a pan or popper, keep the beans moving to avoid scorching.
- Monitor temperature: Use a thermometer to maintain consistent heat in pan roasting. Overheating leads to burnt beans and excessive smoke.
- Start small: Roast small batches (½–1 pound) while learning; they're easier to manage and cool quickly.
- Keep notes: Record times, temperatures and flavors to refine your technique.
- Handle with care: Beans and pans will be extremely hot—always use oven mitts and heat‑proof tools.
Conclusion
Home coffee roasting is an accessible, rewarding way to customise your coffee. Using a skillet, a stovetop popcorn popper or your oven, you can turn green beans into aromatic brown beans in about 20 minutes. Listen for the first and second cracks to determine roast level, cool the beans quickly, and let them off‑gas before storing. With practice you'll learn how subtle changes in time and temperature affect flavor. Whether you're brewing a bright light roast for breakfast or a rich dark roast for espresso, the ability to roast at home puts the freshest cup right at your fingertips.